Installing ASYCUDA on a Mac – A Quick Guide

If you’ve ever tried installing ASYCUDA on a Mac, you know it can be a frustrating experience. With macOS’s tight security measures and Java’s evolving standards, getting ASYCUDA to run smoothly can feel impossible. This guide will walk you through every step of the process, from troubleshooting Java versions to configuring the security settings that will finally get ASYCUDA working on your Mac.
Understanding the Challenges
The main issue stems from compatibility between ASYCUDA and newer versions of Java. As Java versions advance, they introduce stricter security measures that sometimes break compatibility with legacy applications. If you try to run ASYCUDA with anything beyond Java 8, you’ll likely encounter errors like Unsupported major.minor version 52.0.

This guide explains how to set up Asycuda on you Mac so it works.
Step 1: Check Your Current Java Version
First, let’s see which Java version you’re running. Open Terminal and type the following:
java -version
If your Java version is higher than Java 8, you’ll need to uninstall it to proceed.

Step 2: Uninstalling Existing Java Versions
To completely remove any newer versions of Java from your Mac, run the following commands in Terminal:
Remove Java Virtual Machines:sudo rm -rf /Library/Java/JavaVirtualMachines/jdk*.jdk
Remove Java Control Panel:sudo rm -rf /Library/PreferencePanes/JavaControlPanel.prefPane
Remove Supporting Filessudo rm -rf ~/Library/Application\ Support/Oracle/Java
Remove Browser Plug-ins:sudo rm -rf /Library/Internet\ Plug-Ins/JavaAppletPlugin.plugin
After this, check the Java version again: java -version
If uninstalled correctly, it should now display:

Step 3: Download and Install Java 8 (JDK 8u202)
Why Java 8? It offers the best compatibility with ASYCUDA while still maintaining some level of security. Later versions of Java introduce stricter security measures, which can cause ASYCUDA to malfunction.
Download JDK 8u202:
- Visit the Oracle Java SE 8 Archive.
- Download the file:
jdk-8u202-macosx-x64.dmg.
Install JDK 8u202:
- During installation, you might see a failure message. Don’t worry; this is expected.

Once done, check your Java version again java -version
It should now read java version “1.8.0_202”

Step 4: Configure Java Security Settings
To allow ASYCUDA to function correctly, you need to adjust Java’s security settings.
Open the Java Control Panel:
- Search for Java in System Preferences.
- Click to reopen the Java Control Panel.
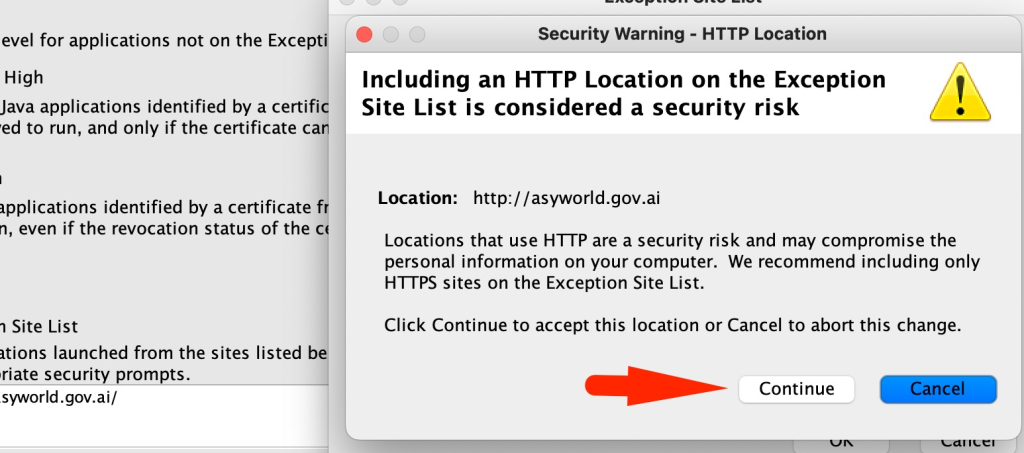
Add ASYCUDA to the Exception Site List:
- Go to the Security tab.
- Click Edit Site List.
- Add your country’s ASYCUDA URL (e.g.,
http://asycuda.yourcountry.gov). - Click continue then ok to save changes.

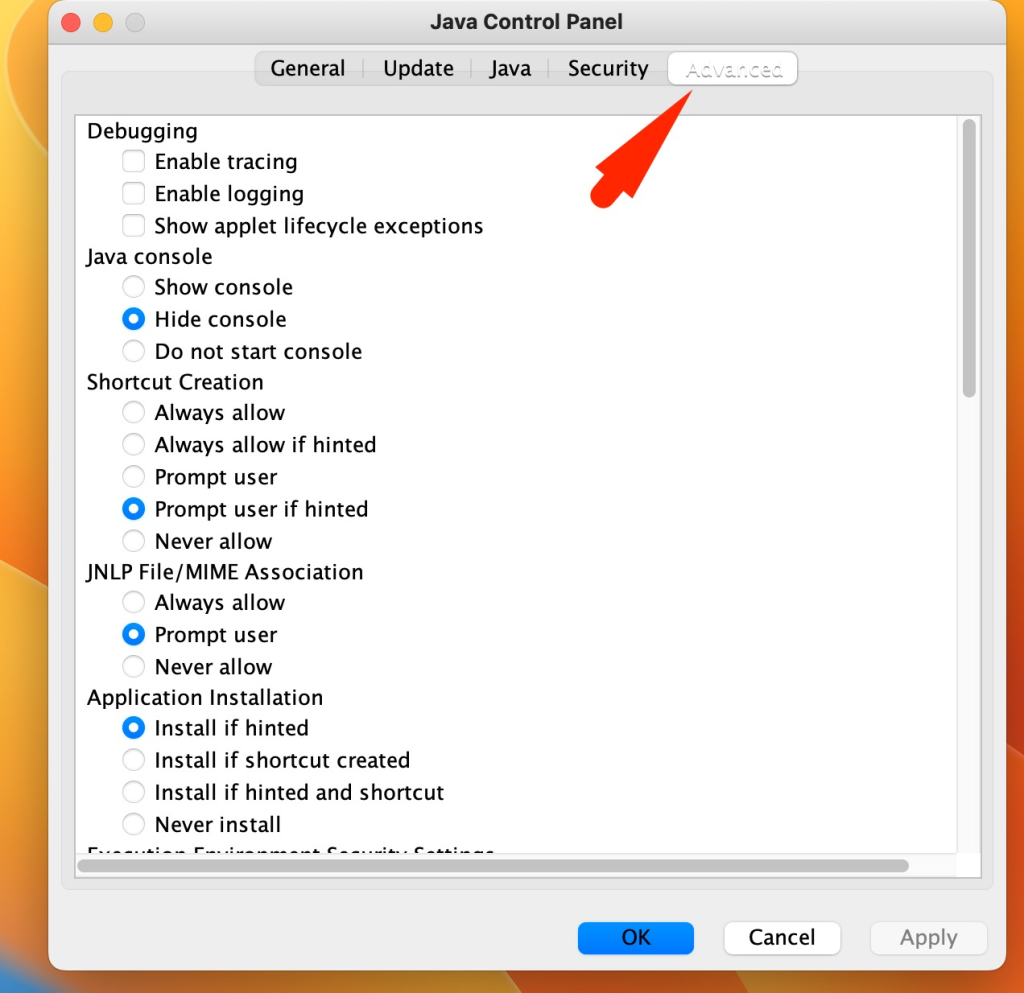
Adjust Advanced Settings:
- Go to the Advanced tab.

- Disable certificate revocation checks:
- Uncheck: “Perform certificate revocation checks on sites from a CA.”
Step 4: Configure Java Security Settings
Now you’re ready to run ASYCUDA.
Download the ASYCUDA JNLP File:
- Download the JNLP file from your country’s ASYCUDA portal.
- Move the file to your Desktop.
Launch ASYCUDA:
- Right-click the JNLP file.
- Select Open With → Java Launcher.

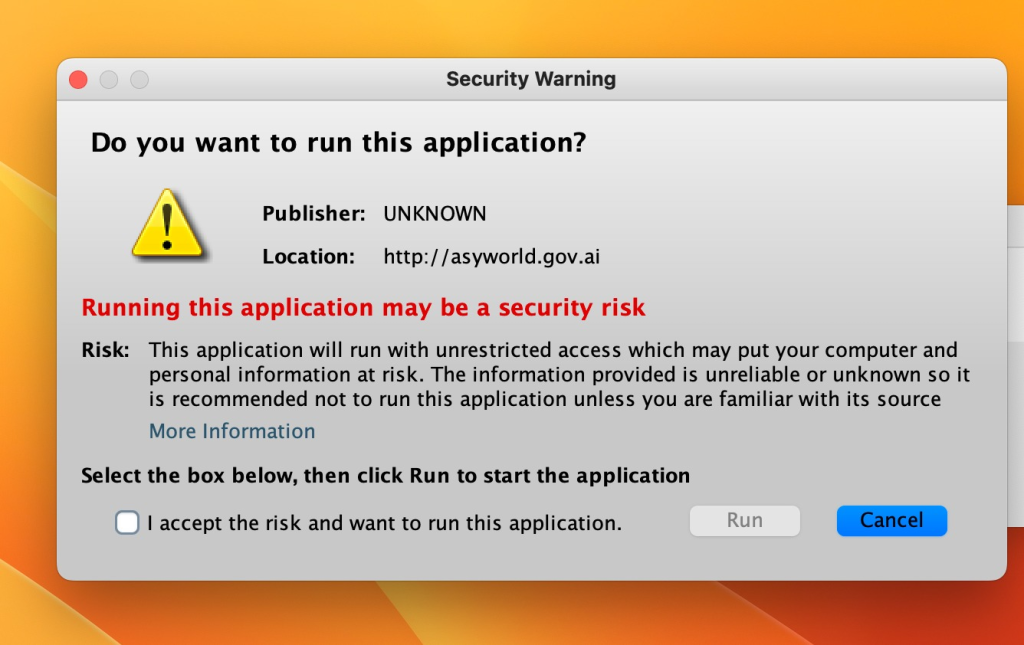
Confirm your security dialogue

ASYCUDA should now open successfully.
Step 6: Troubleshooting Common Issues
Grant Full Disk Access
Go to System Preferences > Security & Privacy > Privacy.
- Go to System Preferences > Security & Privacy > Privacy.
- Select Full Disk Access.
Launch ASYCUDA from Terminal
If the JNLP file doesn’t open via Java Launcher, try this command in Terminal:
javaws ~/Desktop/application.jnlp
Conclusion
Congratulations! You’ve successfully set up ASYCUDA on your Mac. While it may have been a bumpy ride, understanding the balance between security and compatibility is key. By following this guide, you can now use ASYCUDA without compromising your system.
Still having a problem, feel free to reach out to us at support@brokergenius.ai

