How to use
Table of Contents
Getting Started
1. Logging In for the First Time
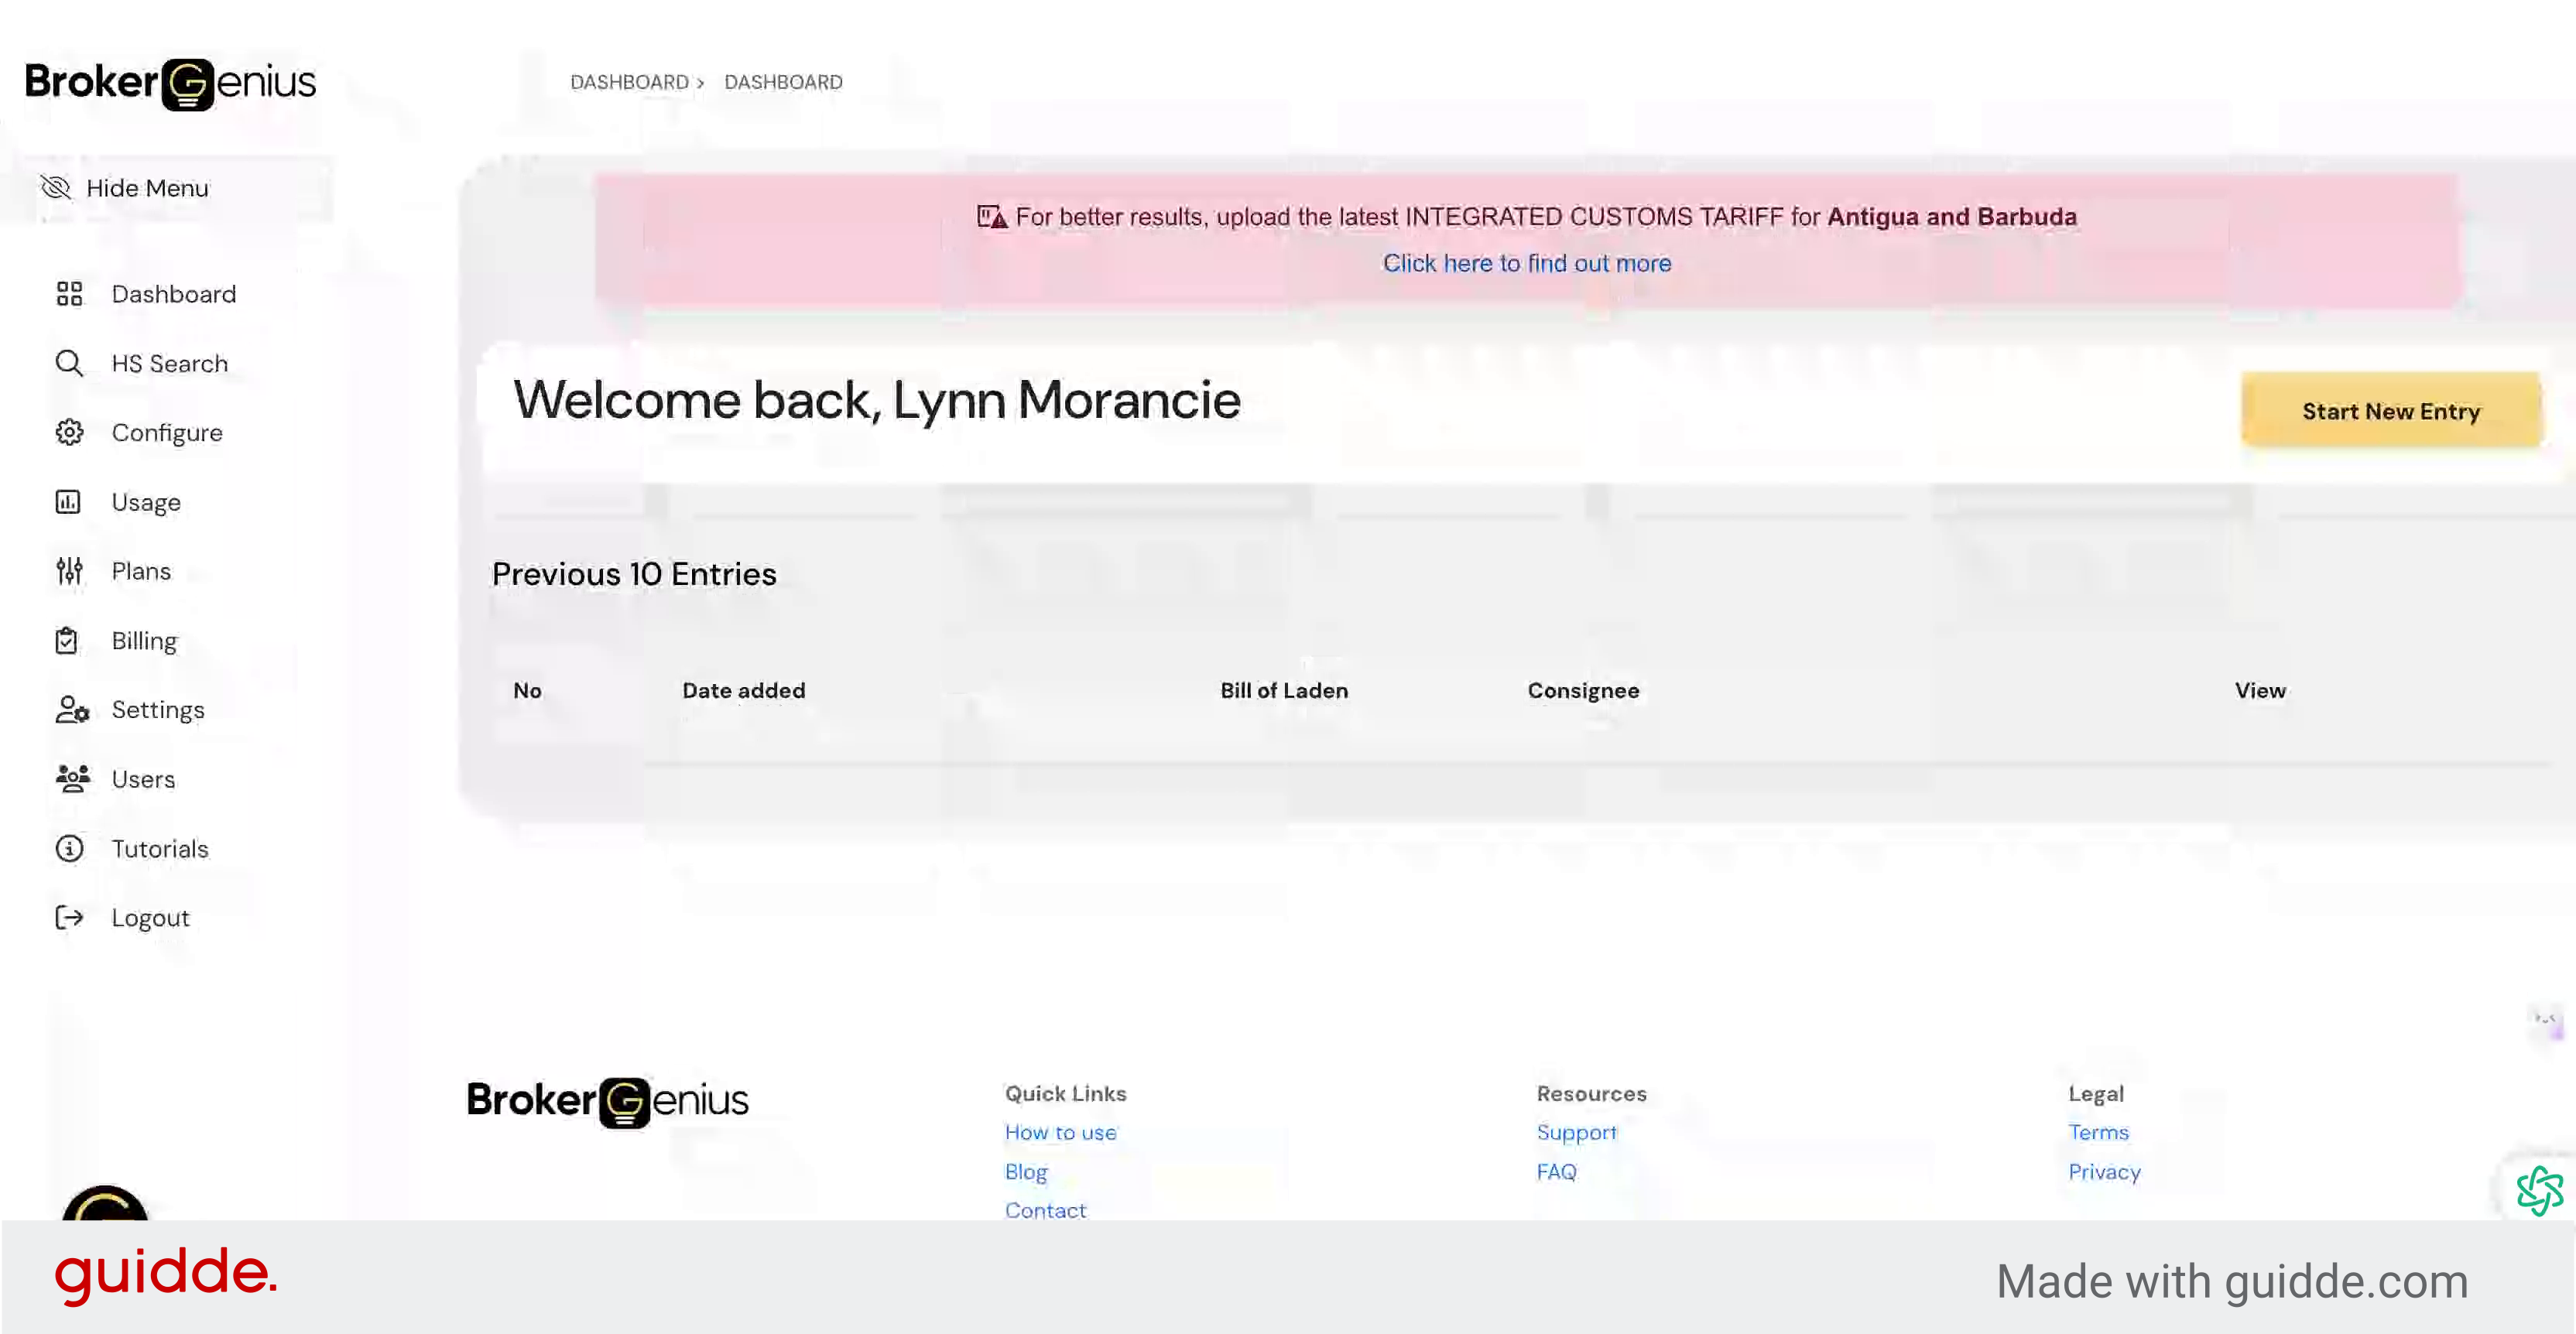
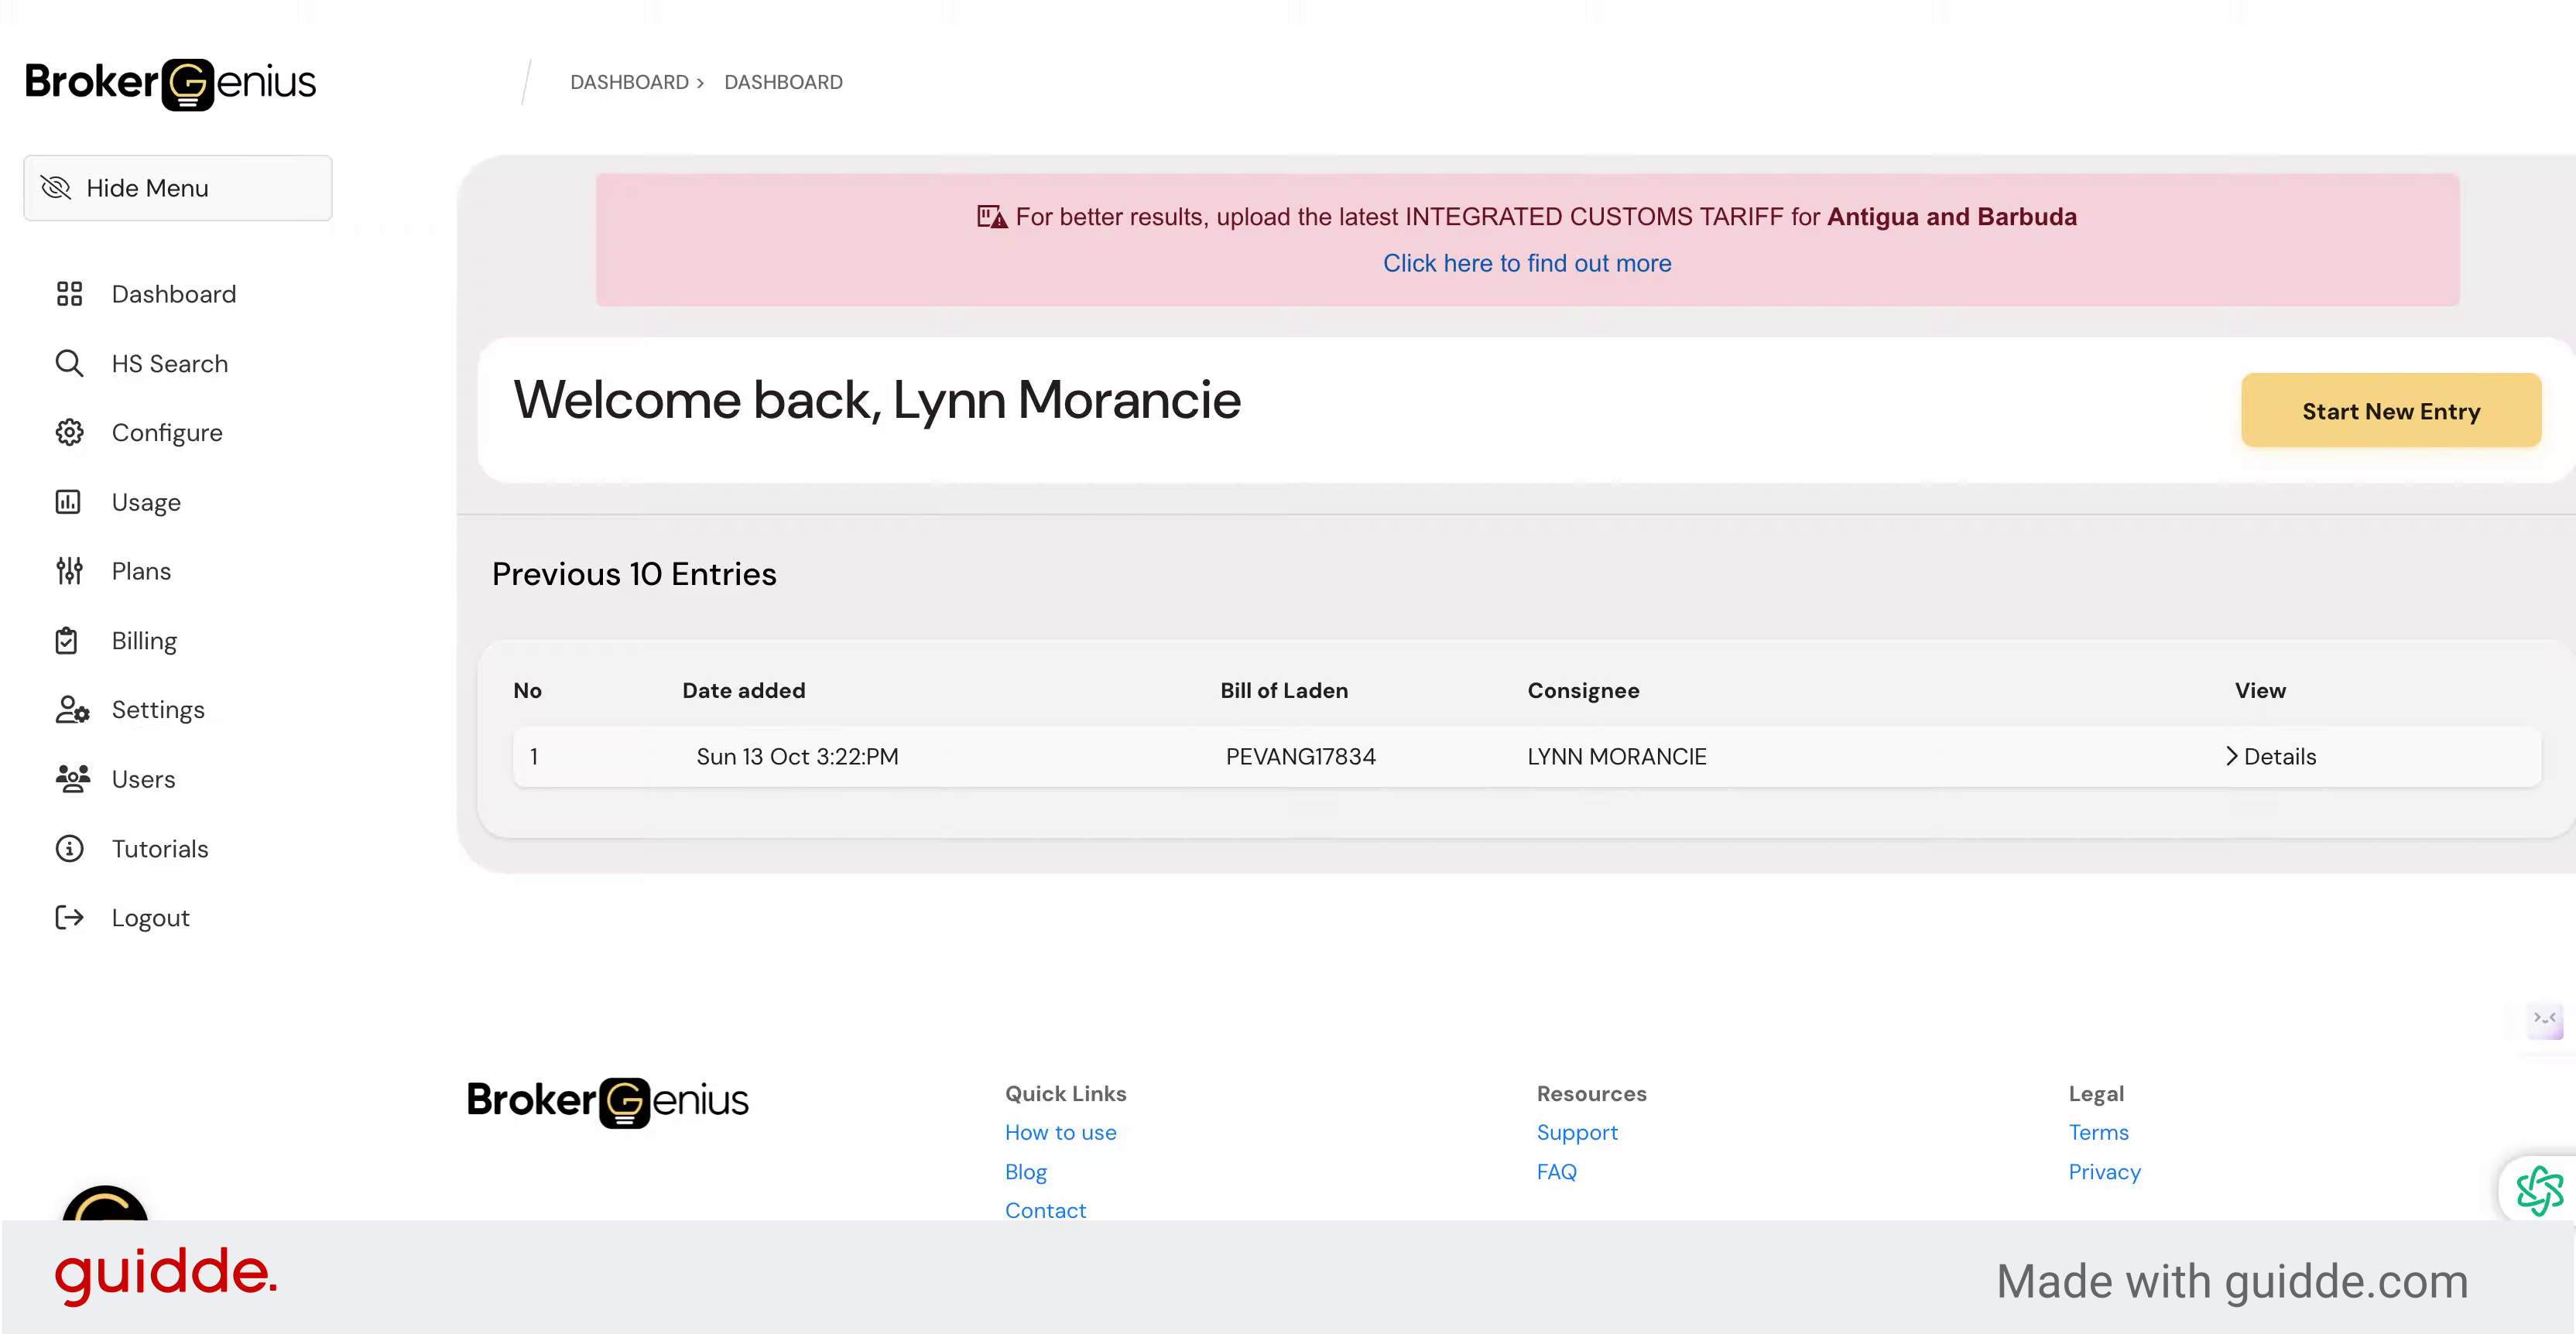
If this is your first time logging into BrokerGenius, you might see a highlighted message on your screen that says:
“We do not have your country’s INTEGRATED CUSTOMS TARIFF. Please click on the ‘Find Out More’ link.”
This message means that BrokerGenius does not yet have access to your country’s specific customs tariff codes and regulations. To resolve this:
- Click on the Find Out More link provided in the message.

- You will be redirected to a page with instructions on how to integrate your country’s customs tariff data into BrokerGenius.
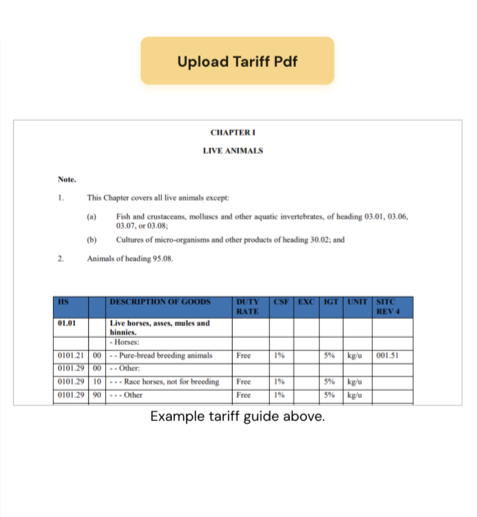
2. Send us your latest tariff codes
To ensure accurate and efficient customs processing, we require you to upload your country’s current Harmonized System (HS) tariff code schedule. This is a crucial step in optimizing our app’s functionality for your specific needs.
3. Input Your Global Variables
To ensure that BrokerGenius operates efficiently and is tailored to your organization’s needs, it’s important to add your Global Variables during setup.
By setting up these variables, you ensure accurate data mapping when submitting customs entries through BrokerGenius to ASYCUDA.
Steps to Input Your Global Variables:
1. Navigate to Global Variables:
a) From the Dashboard, click on the Configure tab located on the left-hand side of the menu.
b) Under the Global Variables section, you will see several fields with numbers that match fields in ASYCUDA.
2. Input Global Variable Data:
The numbers next to each variable in BrokerGenius correspond directly with the field numbers in ASYCUDA. This ensures that data will be automatically transferred to the correct field when submitting customs documents.
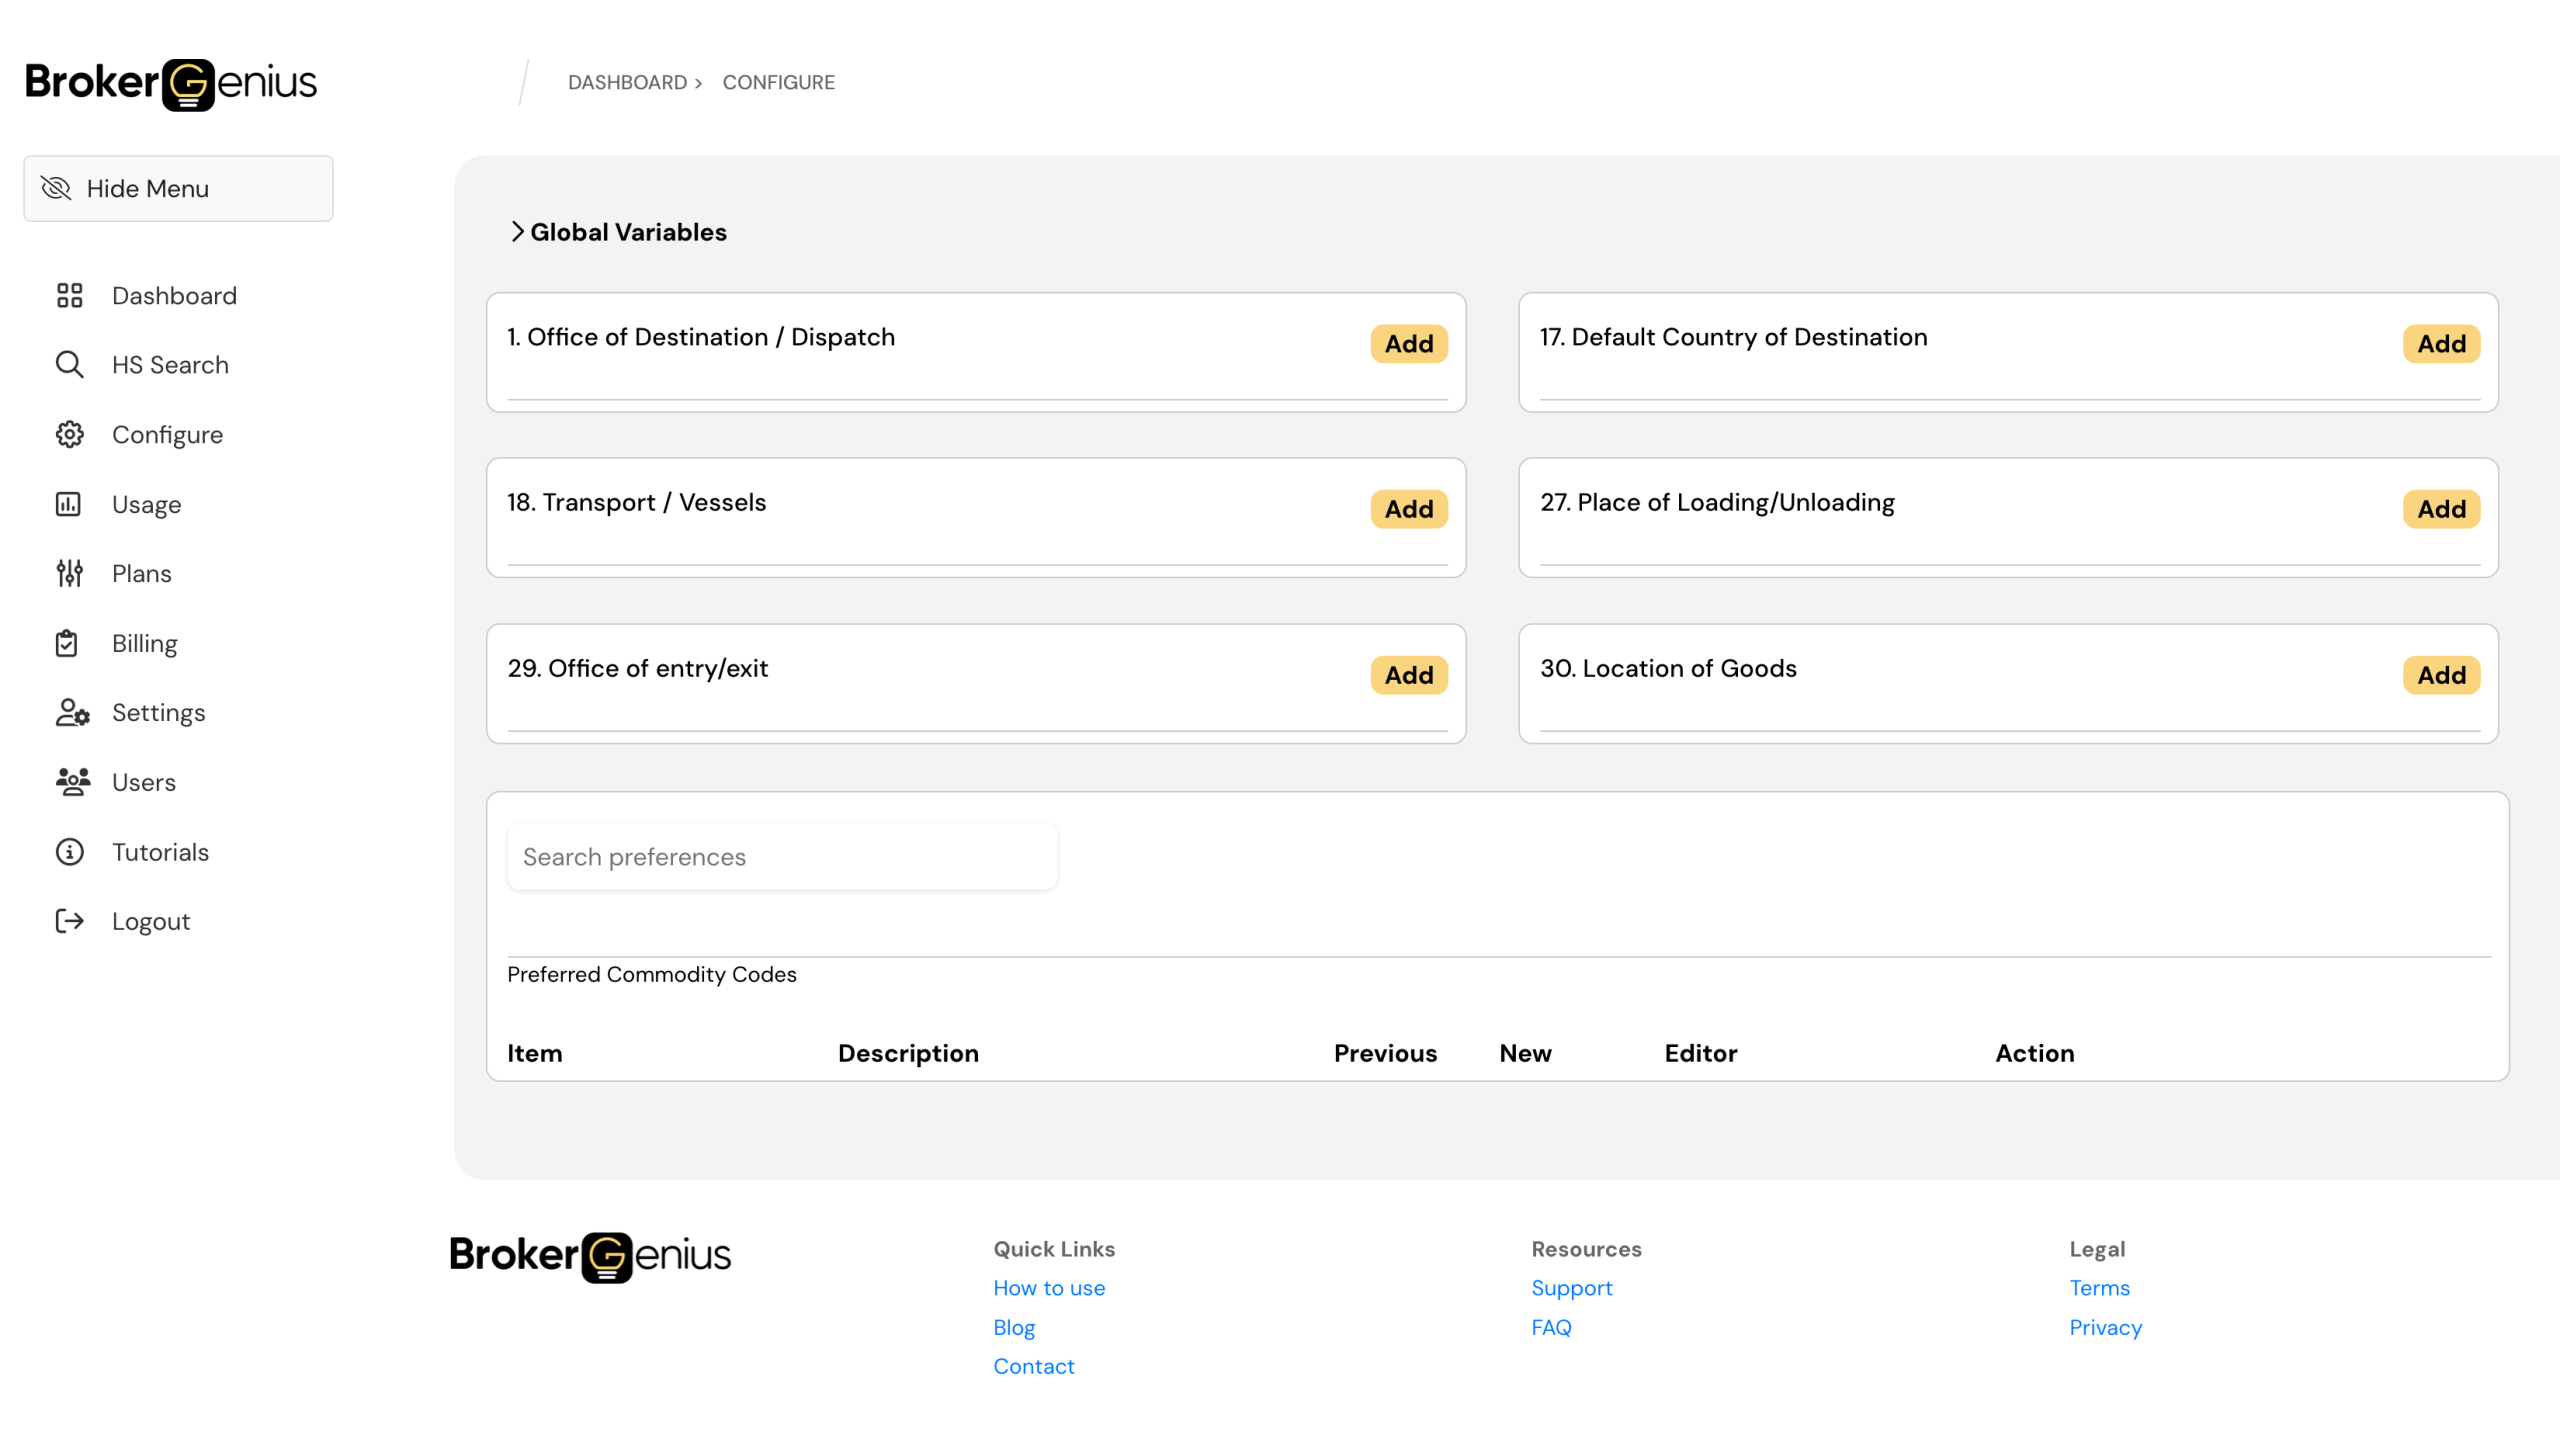
Here’s a guide for entering the most important variables:
1. Office of Destination/Dispatch (ASYCUDA Field 1): Input the customs office where goods are dispatched.
17. Default Country of Destination (ASYCUDA Field 17): Select the most common destination country for your shipments.
18. Transport/Vessels (ASYCUDA Field 18): Specify the primary mode of transport or vessel used.
27. Place of Loading/Unloading (ASYCUDA Field 27): Enter the location where goods are loaded/unloaded for transportation.
29. Office of Entry/Exit (ASYCUDA Field 29): Input the customs office responsible for handling entry or exit of goods.
30. Location of Goods (ASYCUDA Field 30): Specify the location where goods are stored or processed.
The following table shows how the fields in BrokerGenius map to fields in ASYCUDA:
| BrokerGenius Variable | ASYCUDA World Field |
|---|---|
| 1. Office of Destination | 1. Office of Destination/Dispatch |
| 17. Default Country of Destination | 17. Country of Destination |
| 18. Transport/Vessels | 18. Mode of Transport |
| 27. Place of Loading/Unloading | 27. Place of Loading/Unloading |
| 29. Office of Entry/Exit | 29. Office of Entry/Exit |
| 30. Location of Goods | 30. Location of Goods |
Starting a New Entry
1. Uploading Your Waybill
This guide will walk you through the process of uploading a waybill in Brokergenius
1. Automatic Waybill Upload
From initiating a new entry to the final upload process, you can now efficiently manage your waybill submissions.
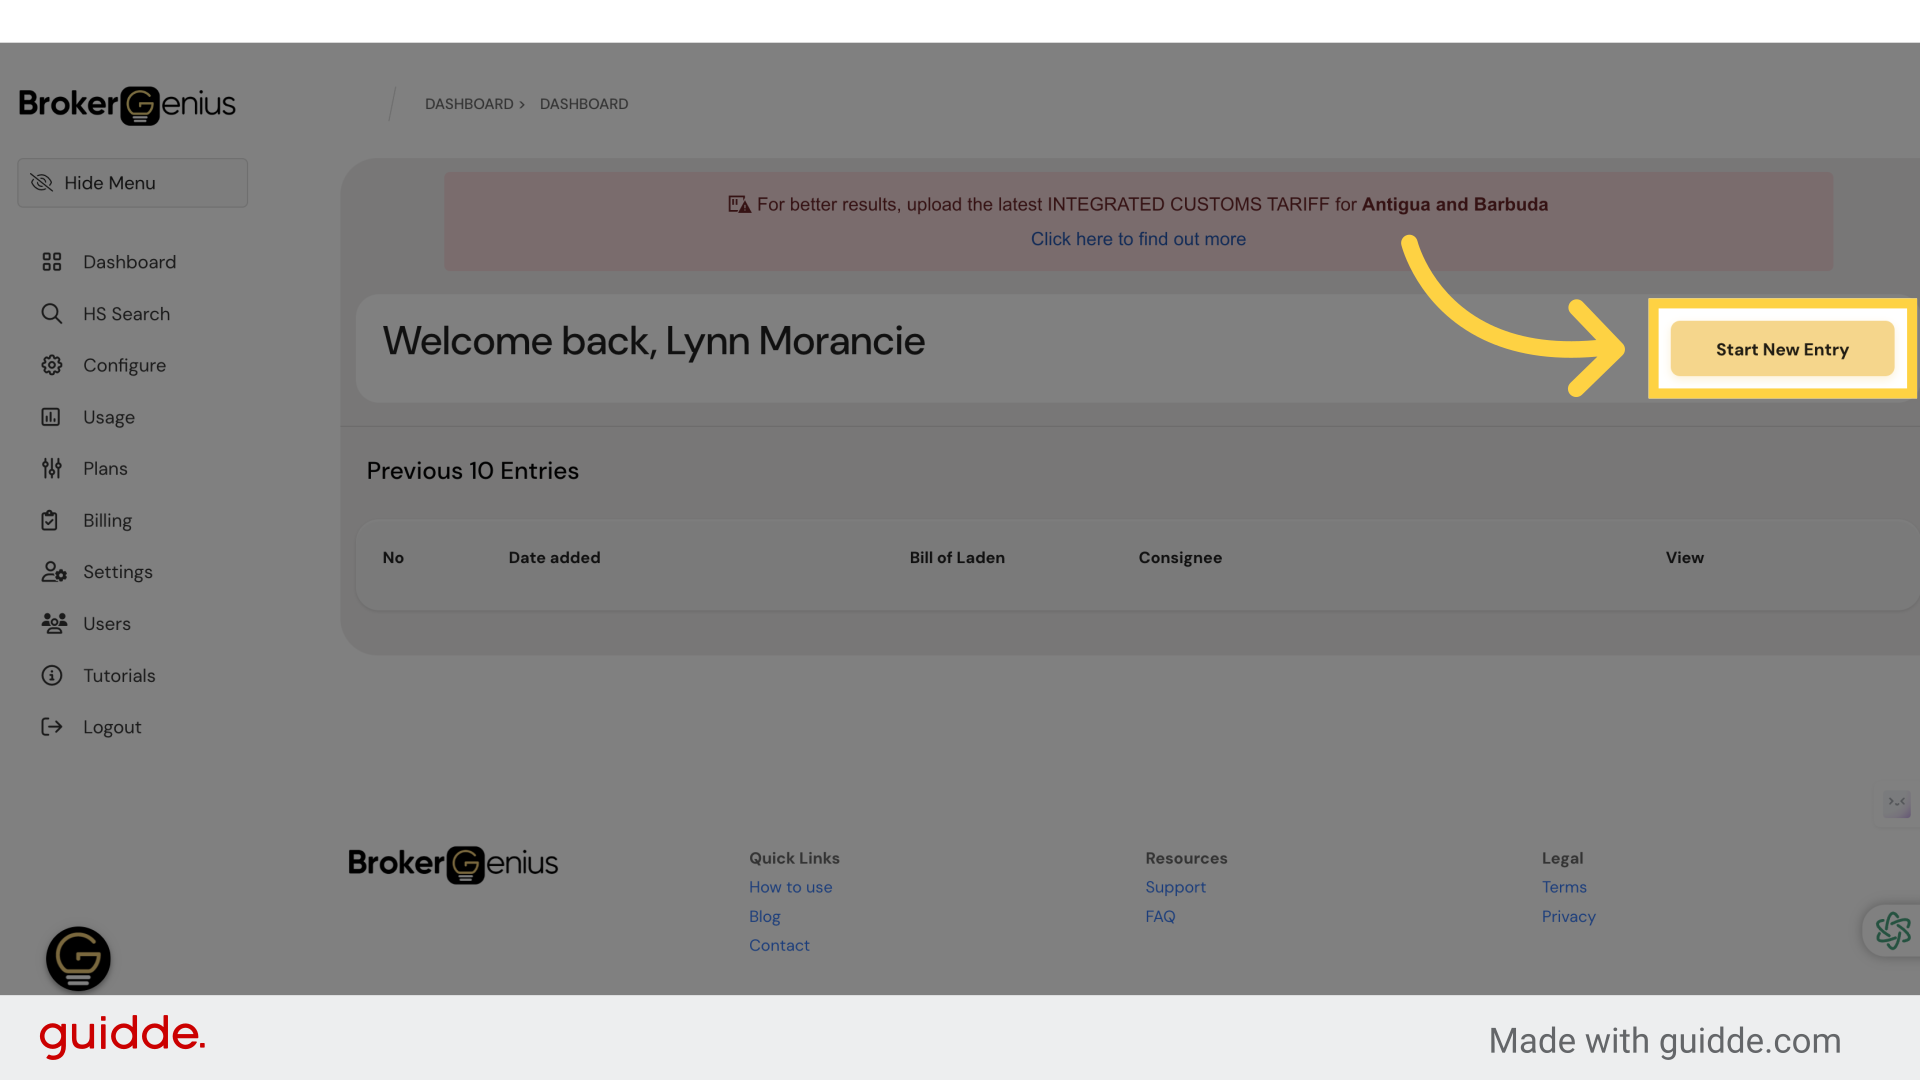
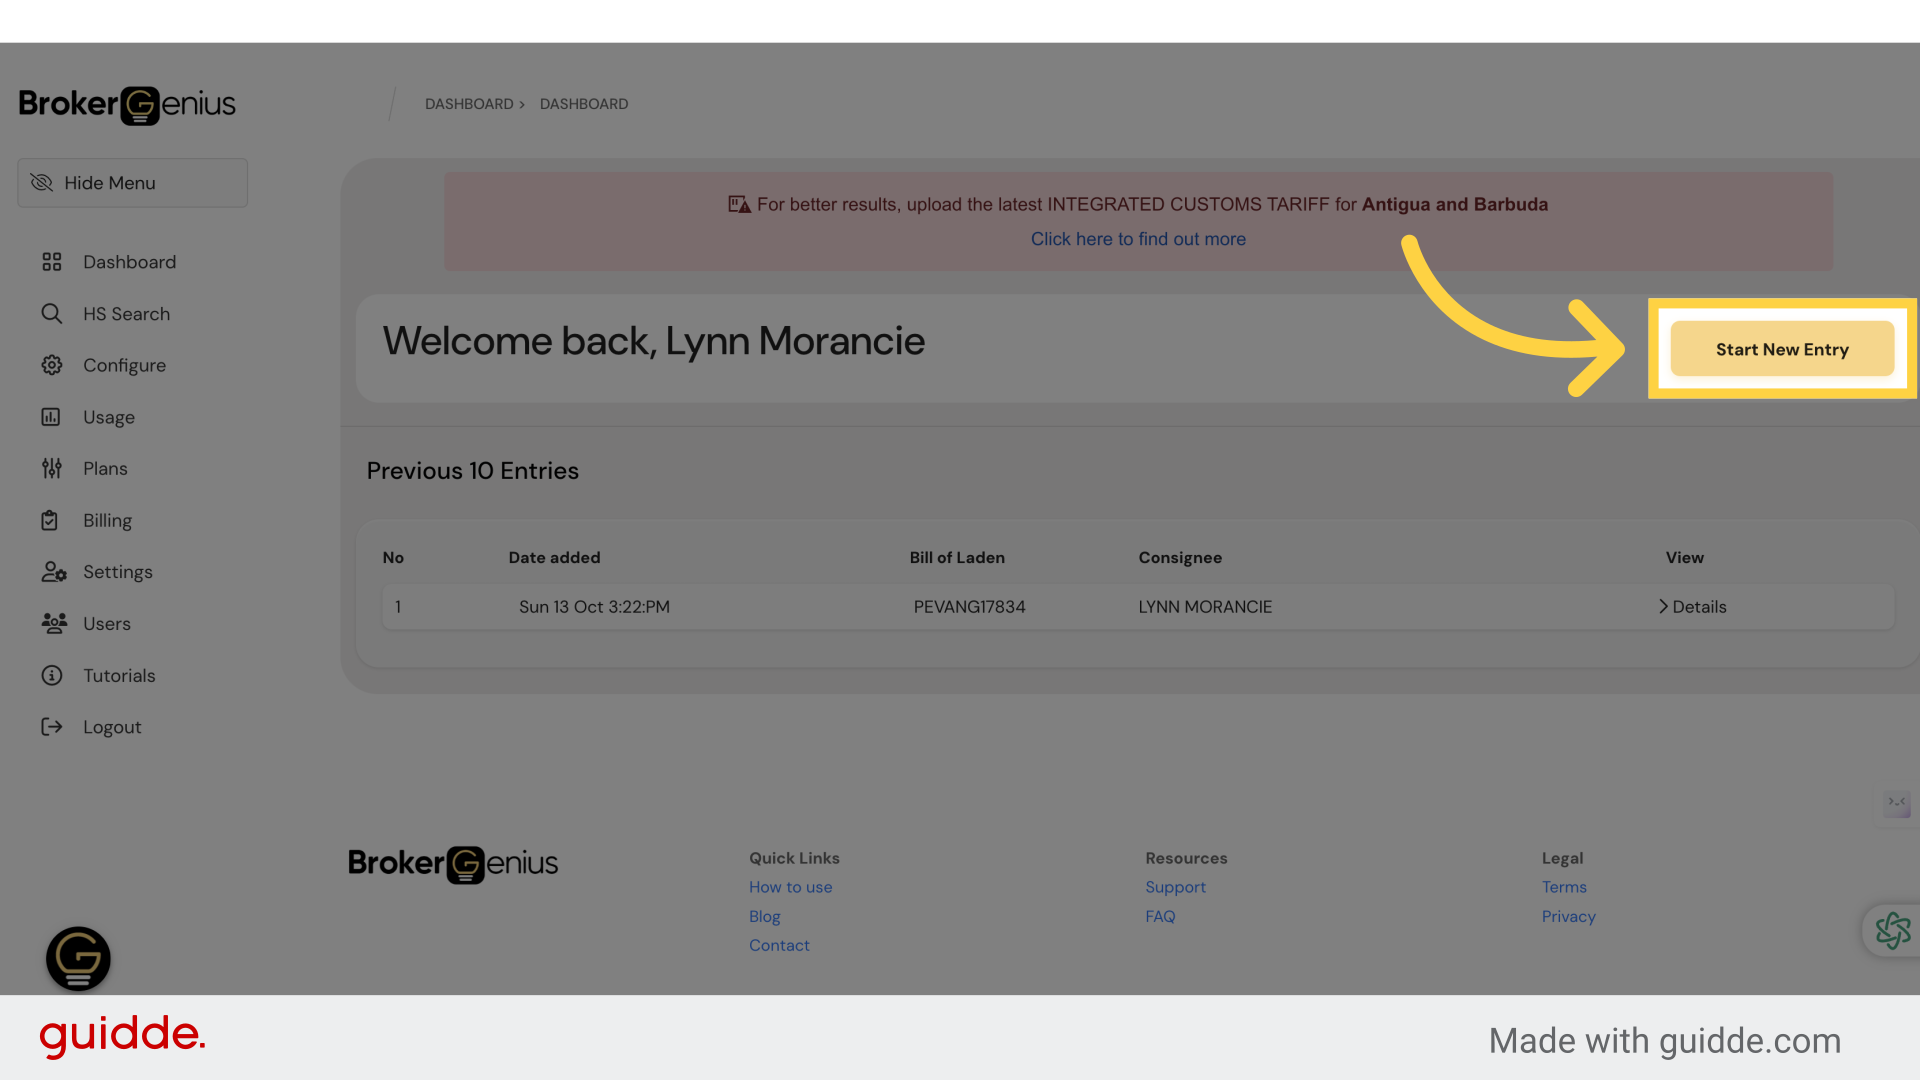
2. Click “Start New Entry”
Initiate a new entry by clicking on “Start New Entry
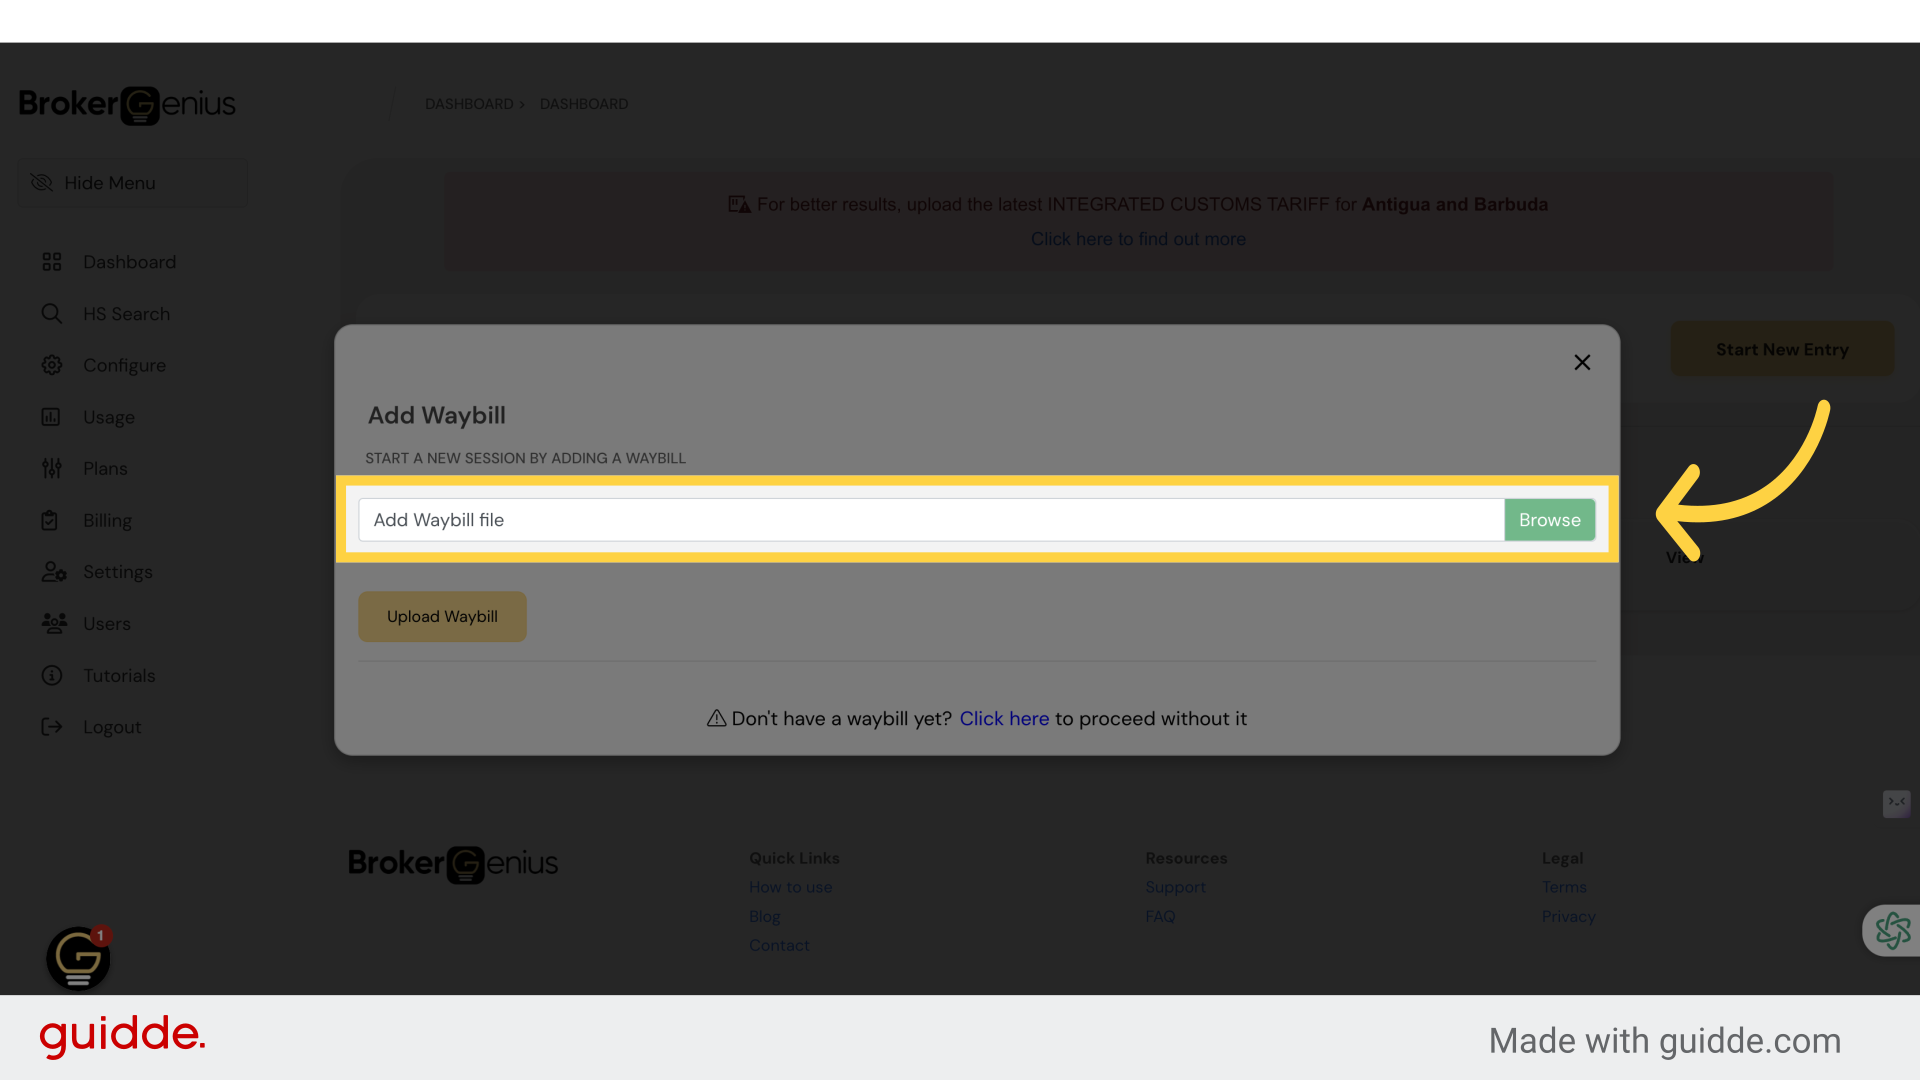
3. Click on Browse
Select the designated area by clicking on the Browse button.
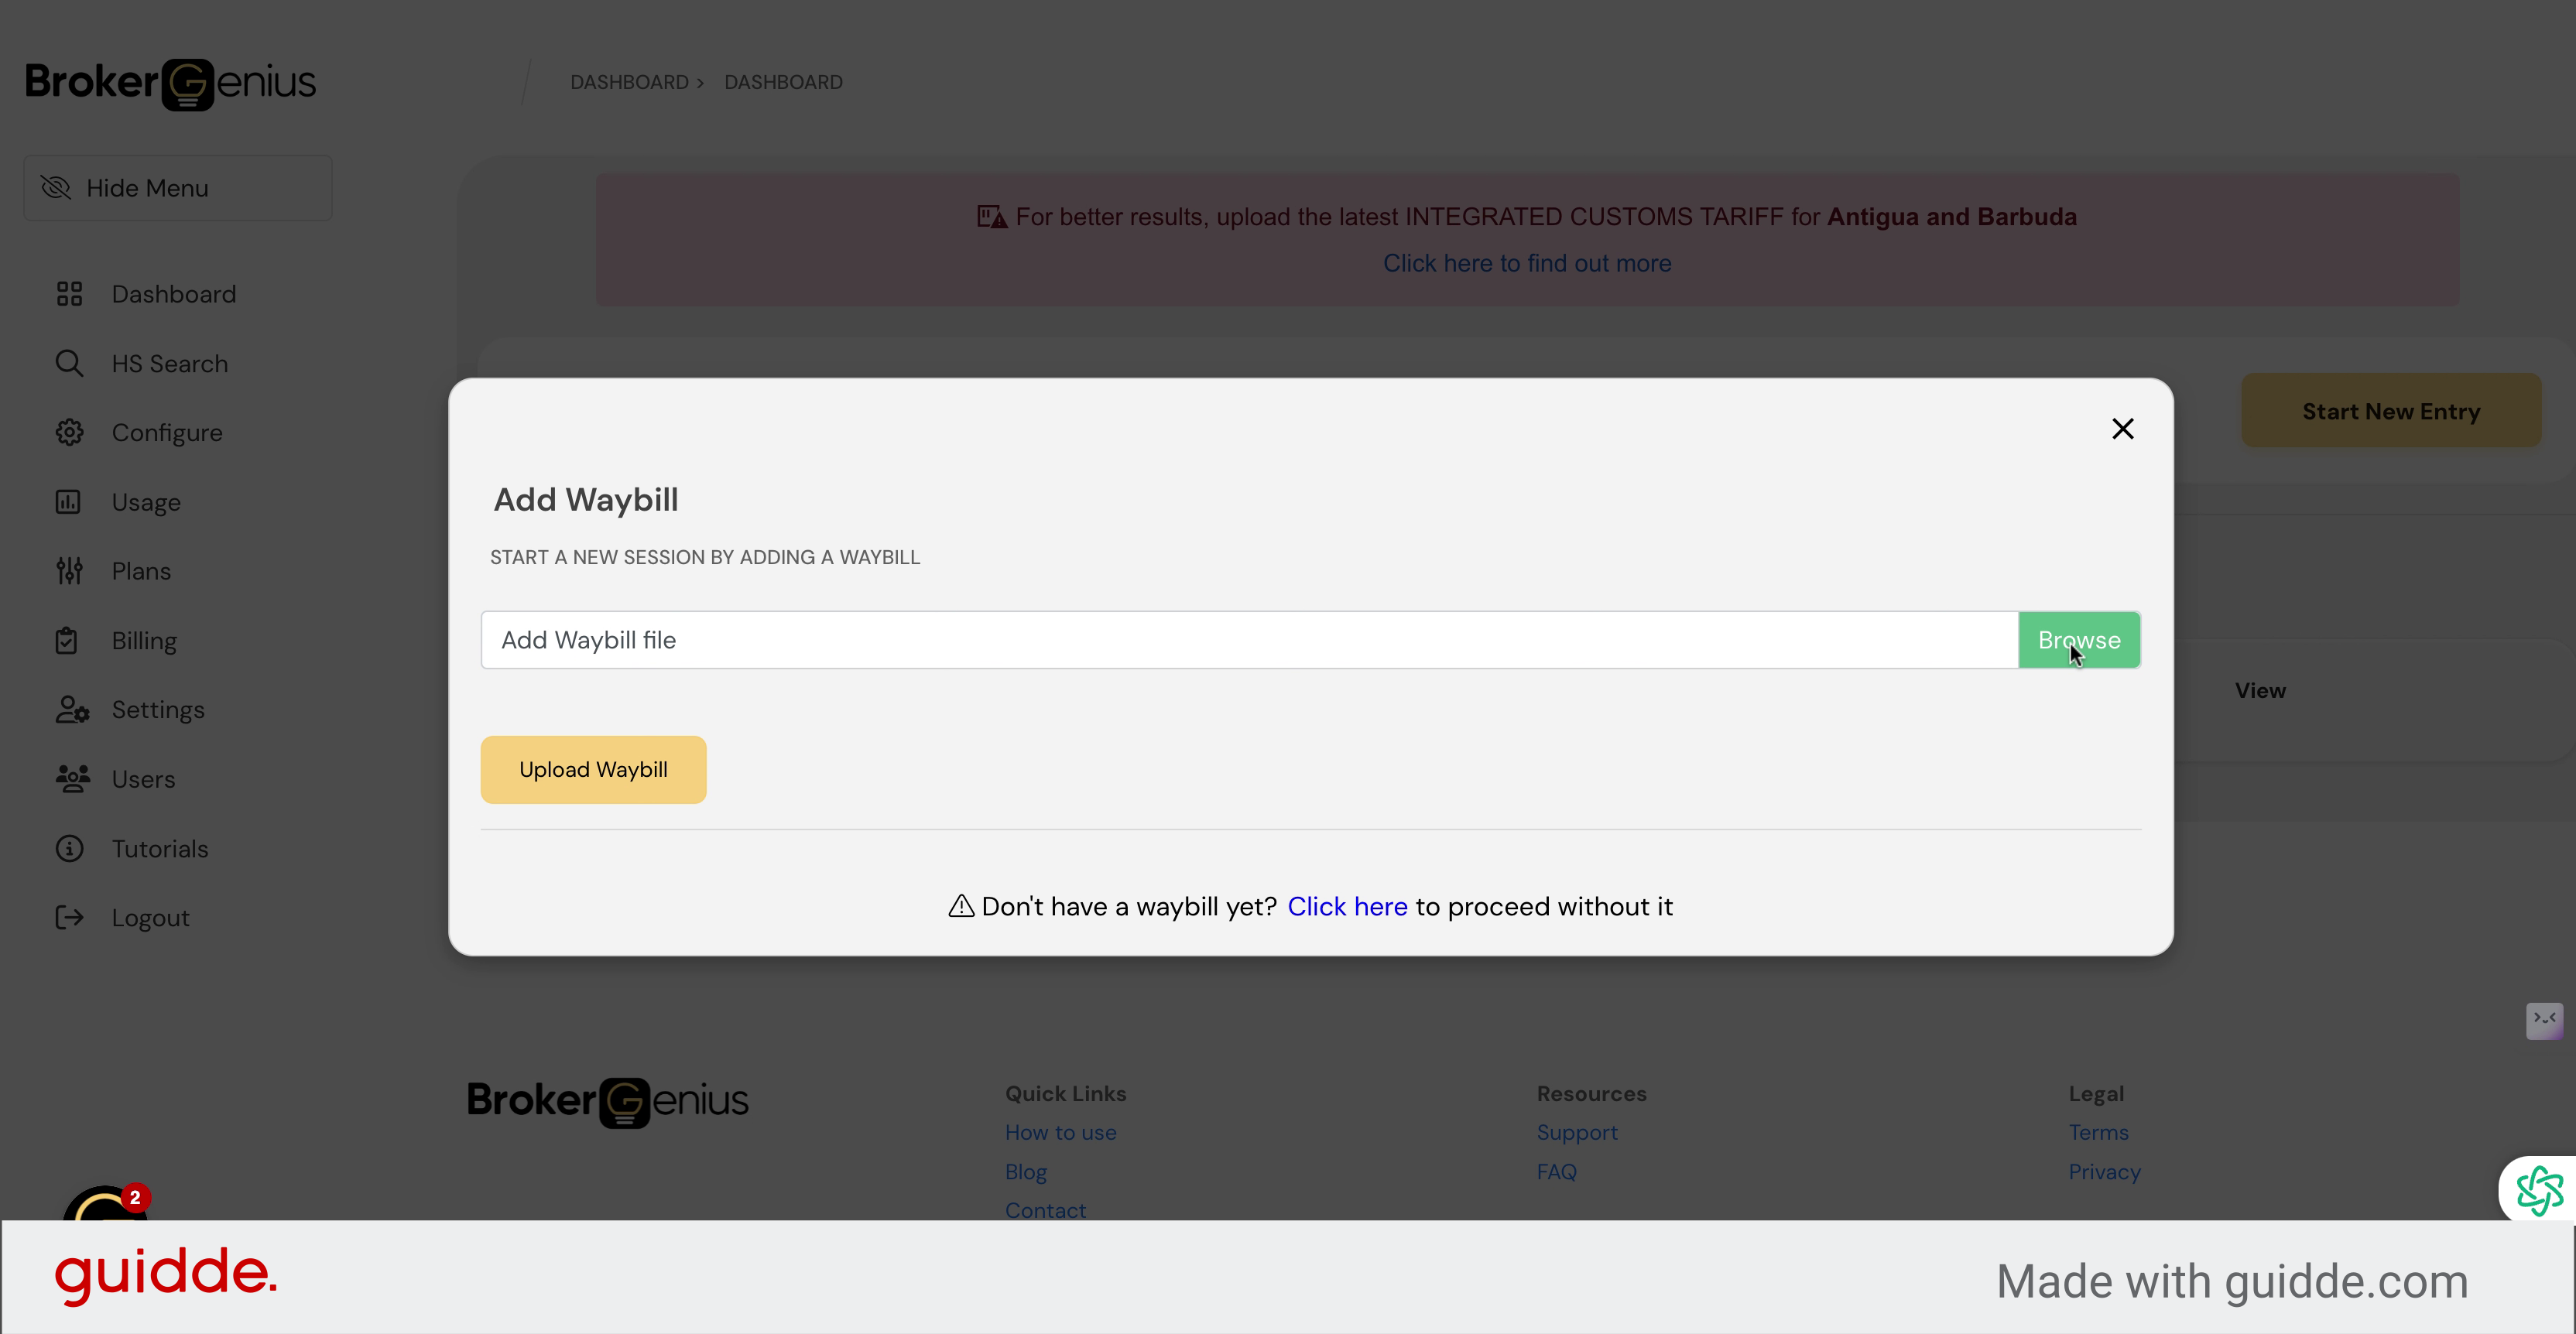
4. Upload Waybill
after choosing your waybill file, you can now click the Upload Waybill button.
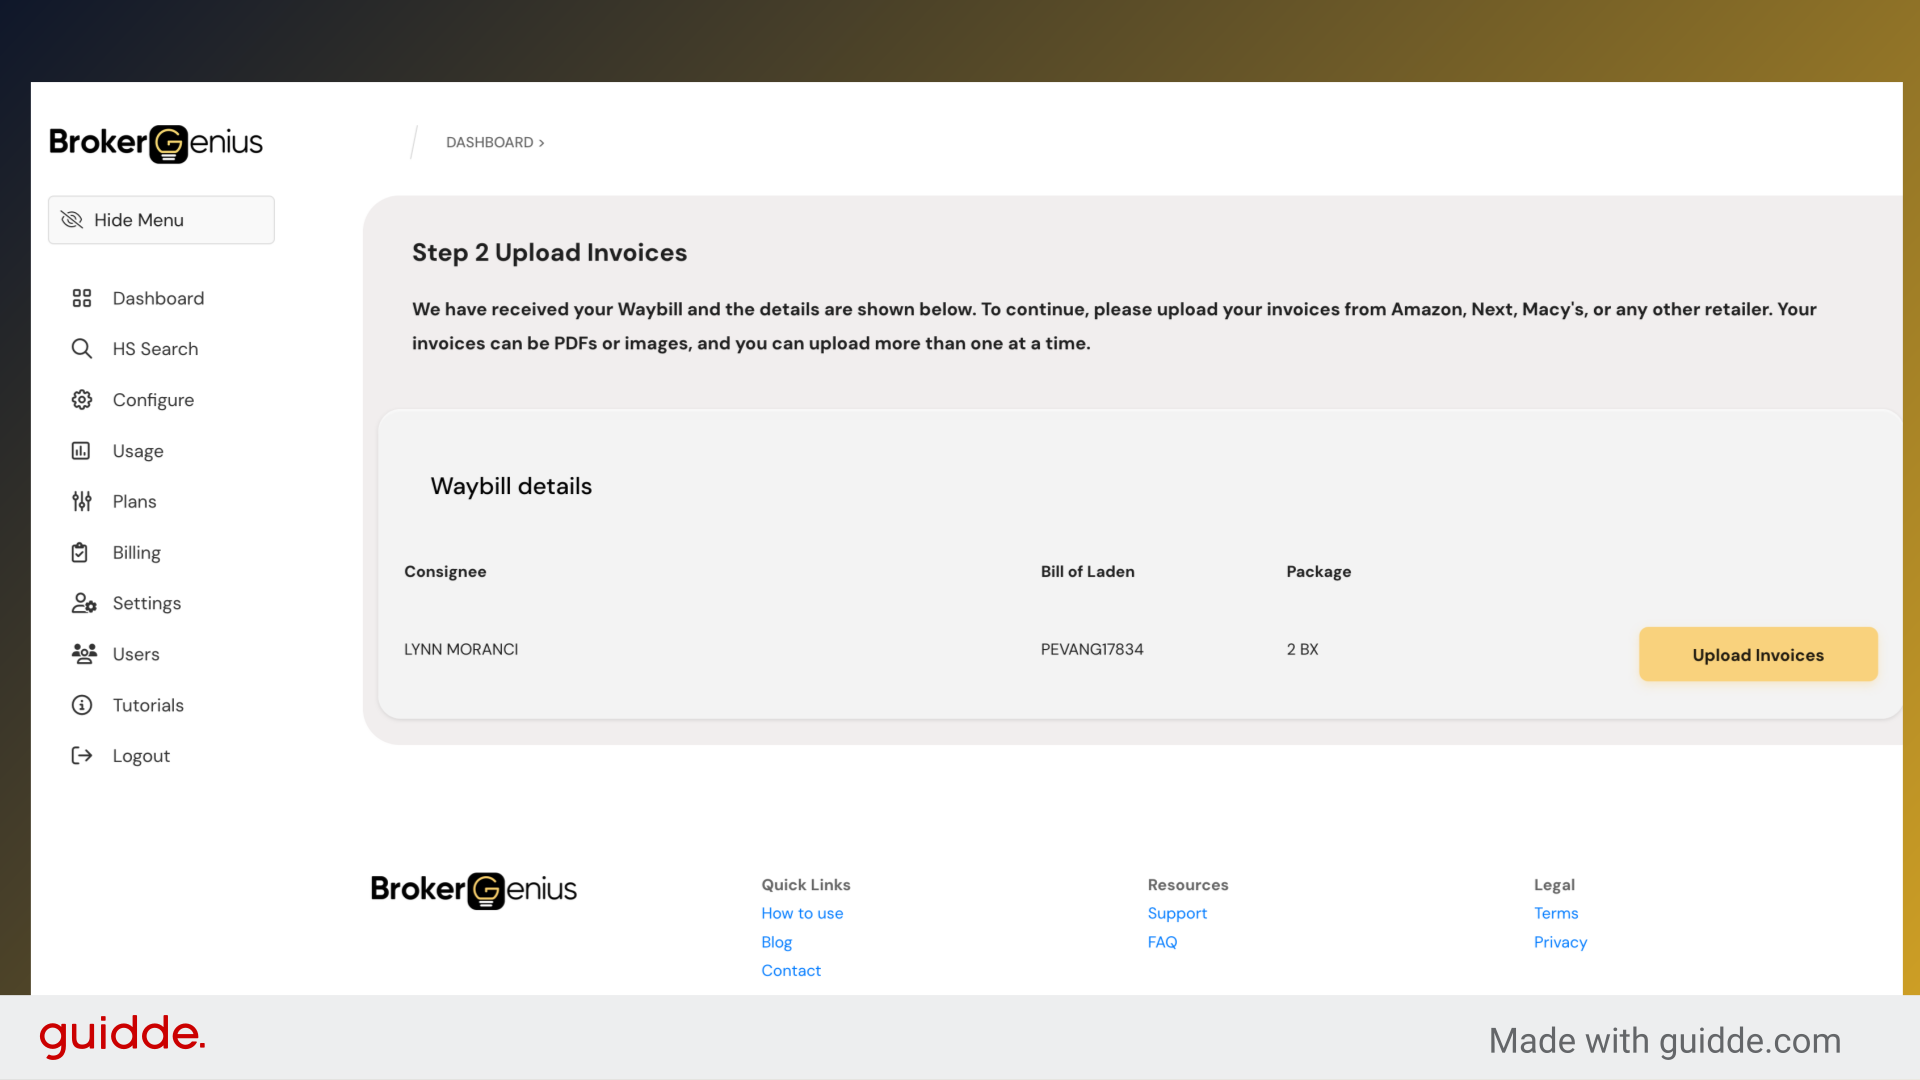
5. Waybill Upload Complete
Your waybill upload is completed. You can now view your waybill details.
Starting a new entry without waybill details.
1. Introduction
Don’t have your waybill details yet? No problem, you can get started anyway. From the Dashboard, Click on the Start Entry button
2. Click “Start New Entry”
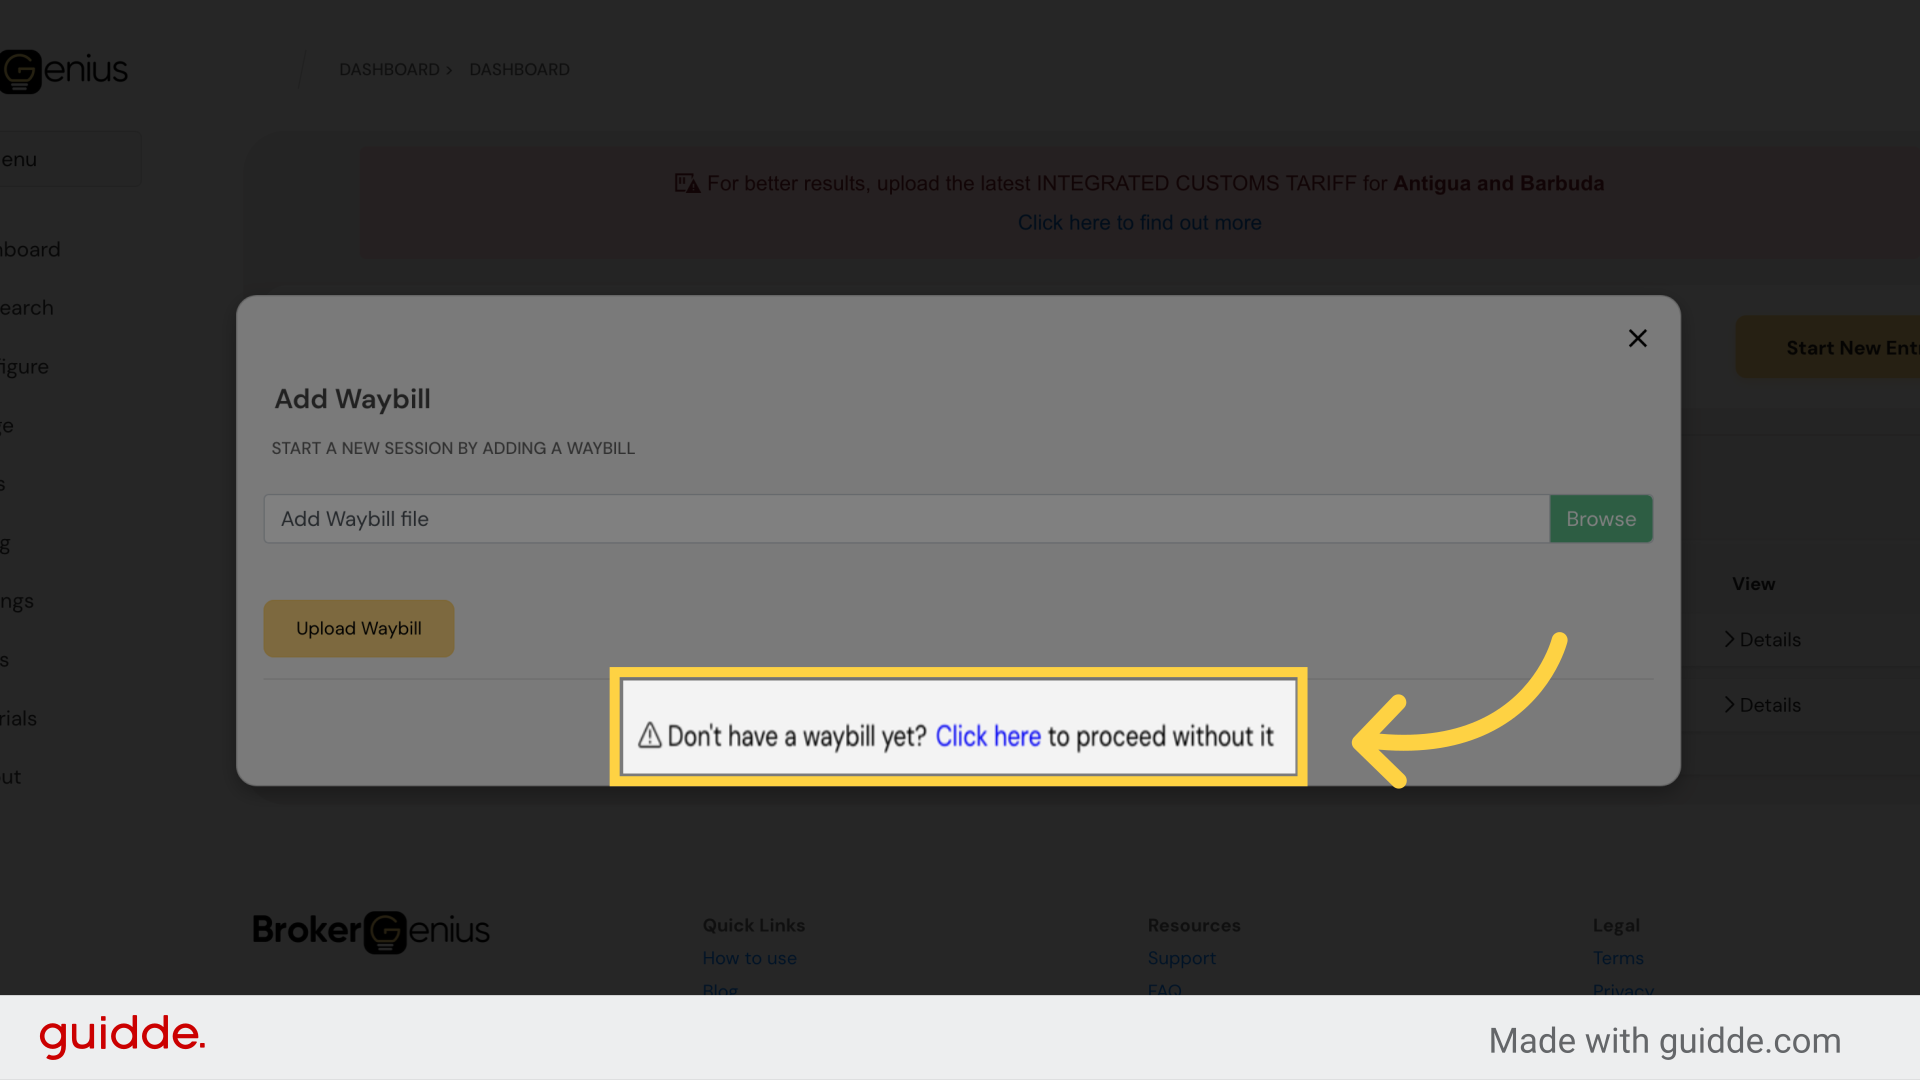
3. manually adding a waybill or proceeding with out a waybill
click on the highlight text (click here) to proceed without a waybill
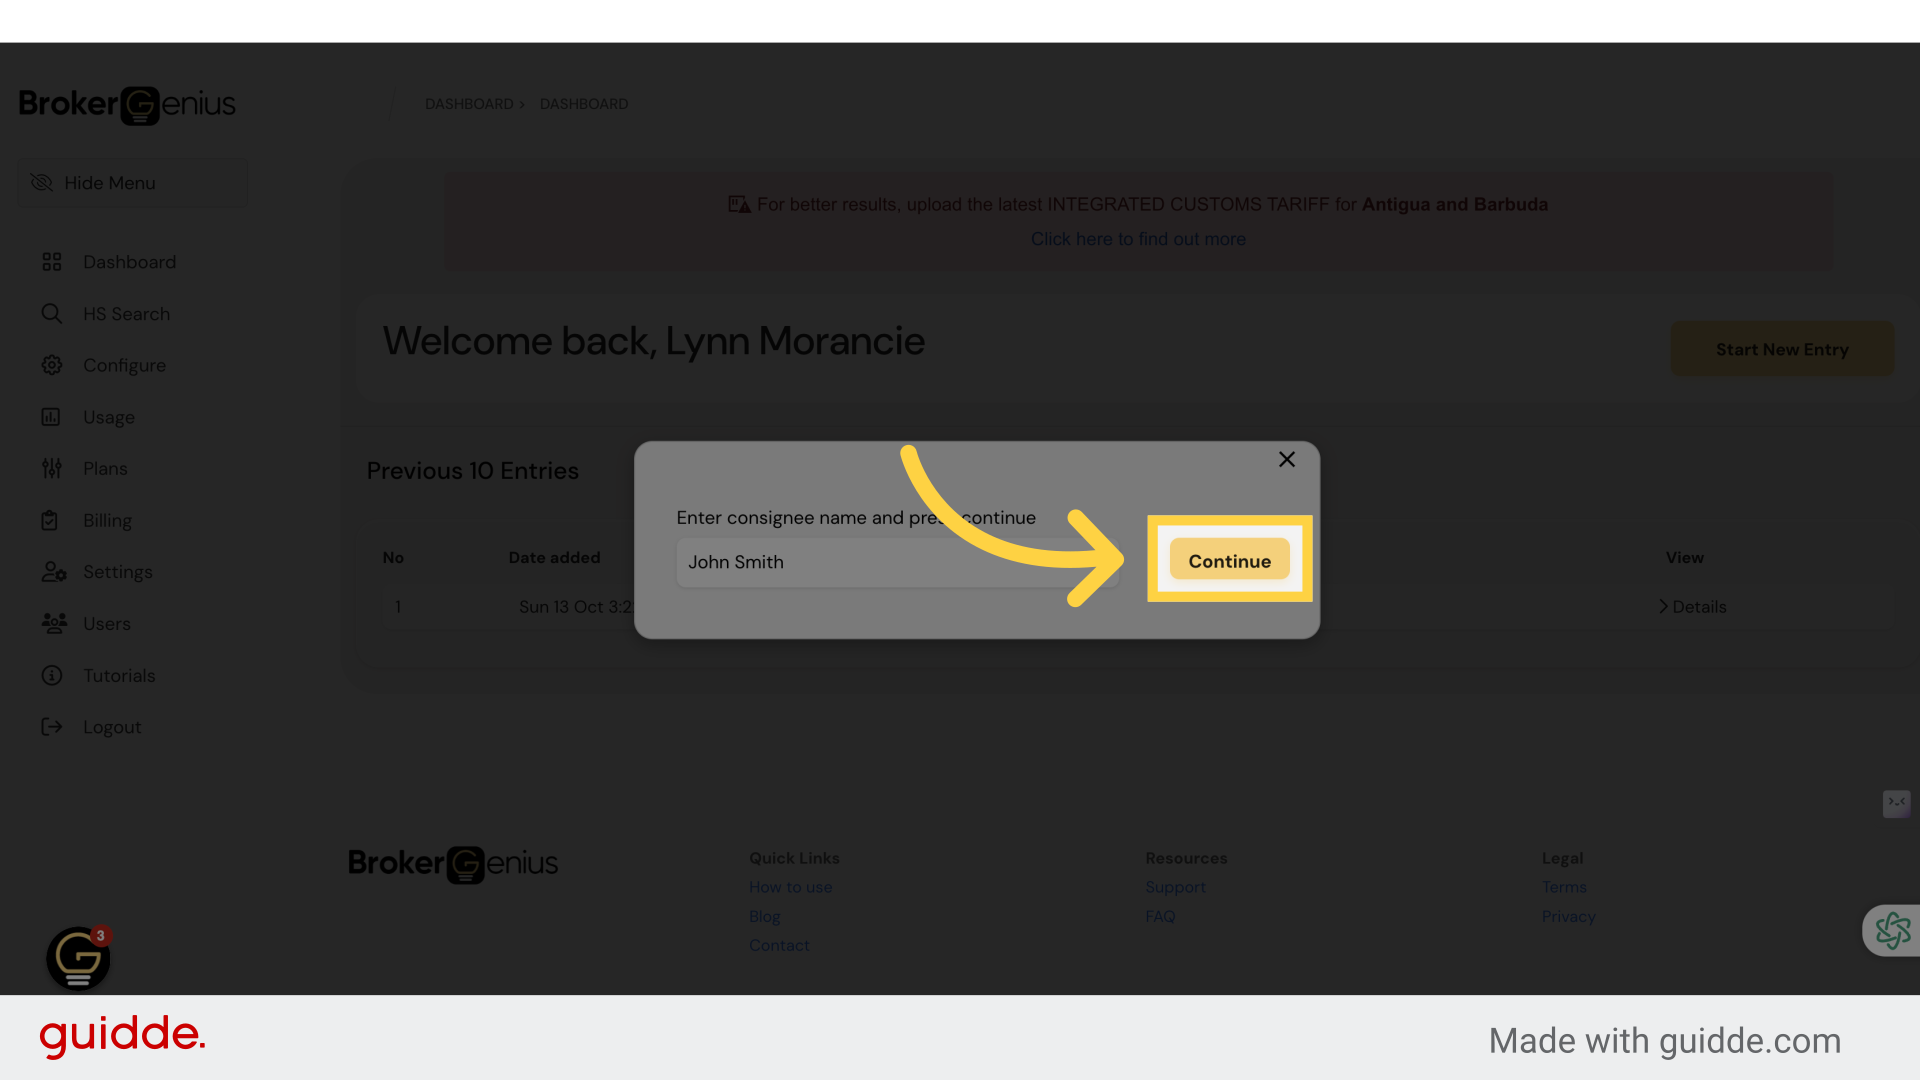
4. Add Consignee Name
Input the co-sign-knee Name in the text box.
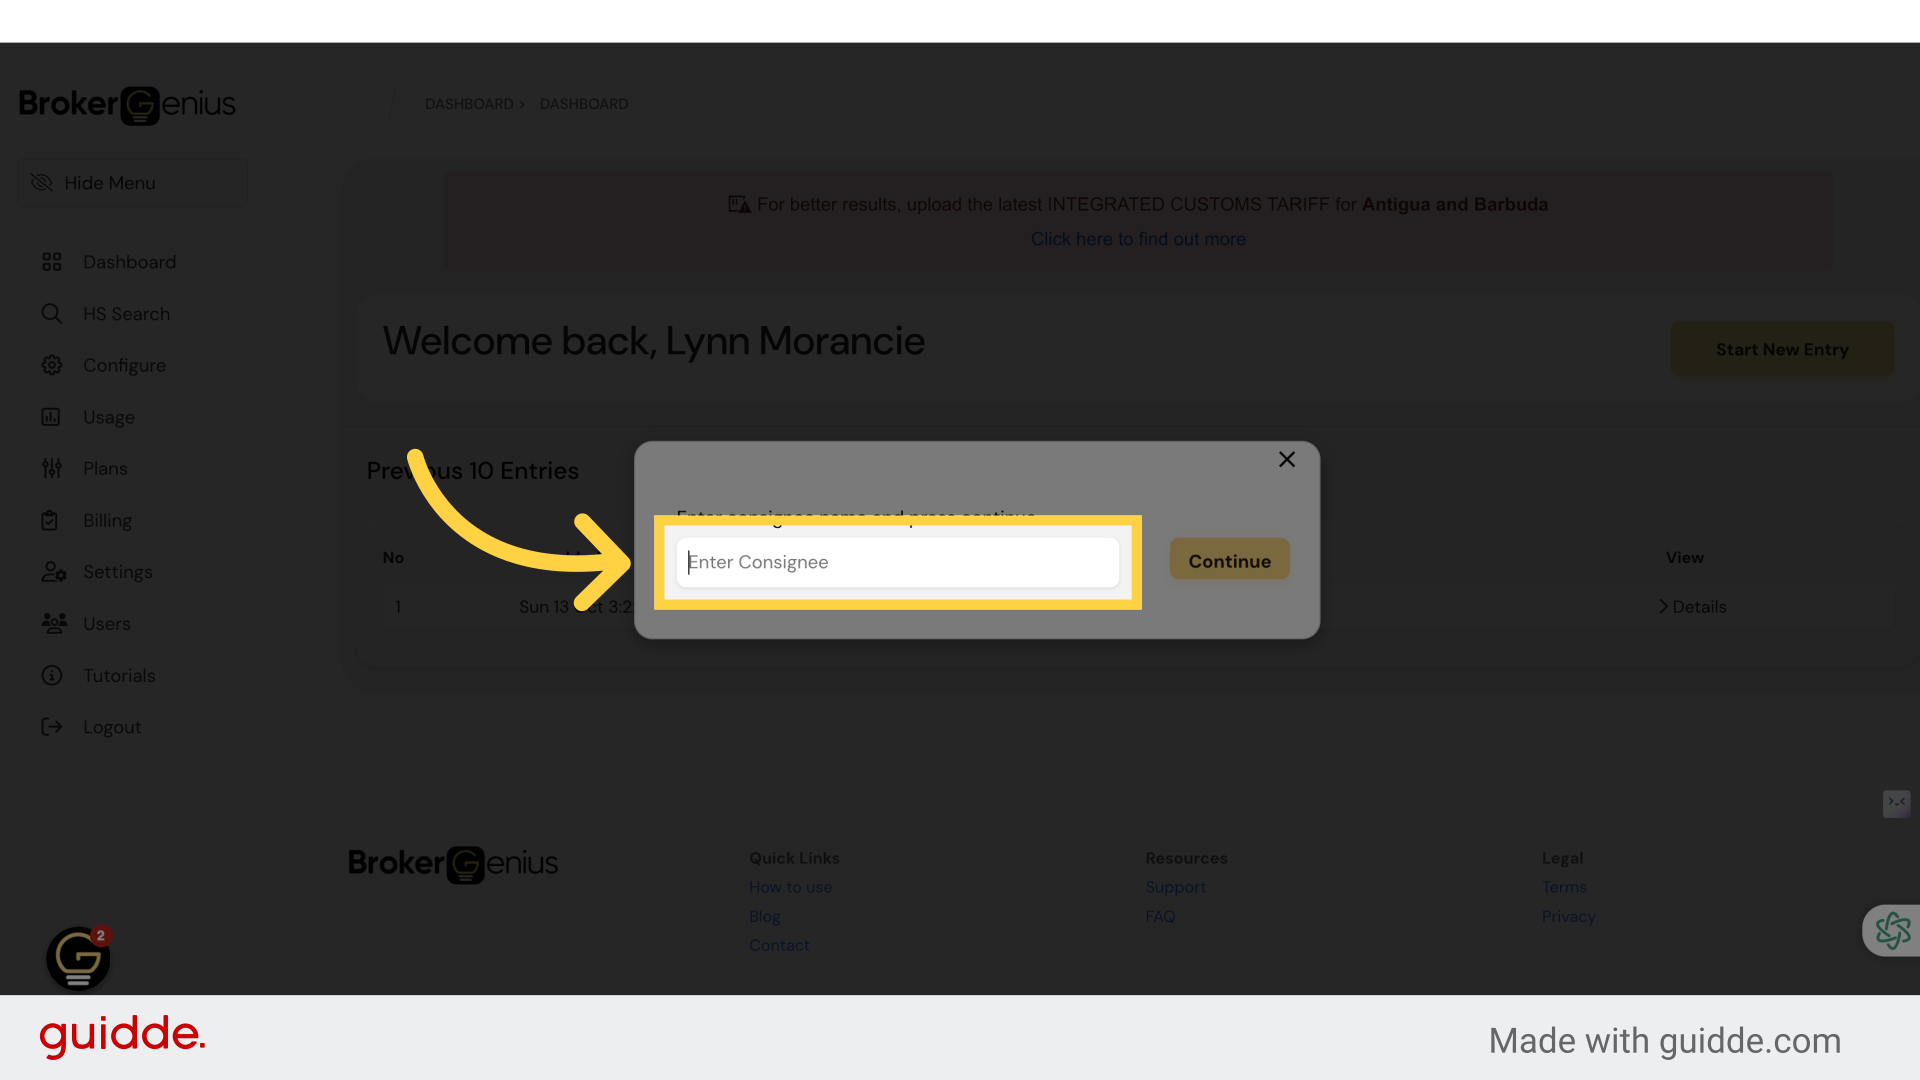
5. Click “Continue”
Proceed by clicking “Continue
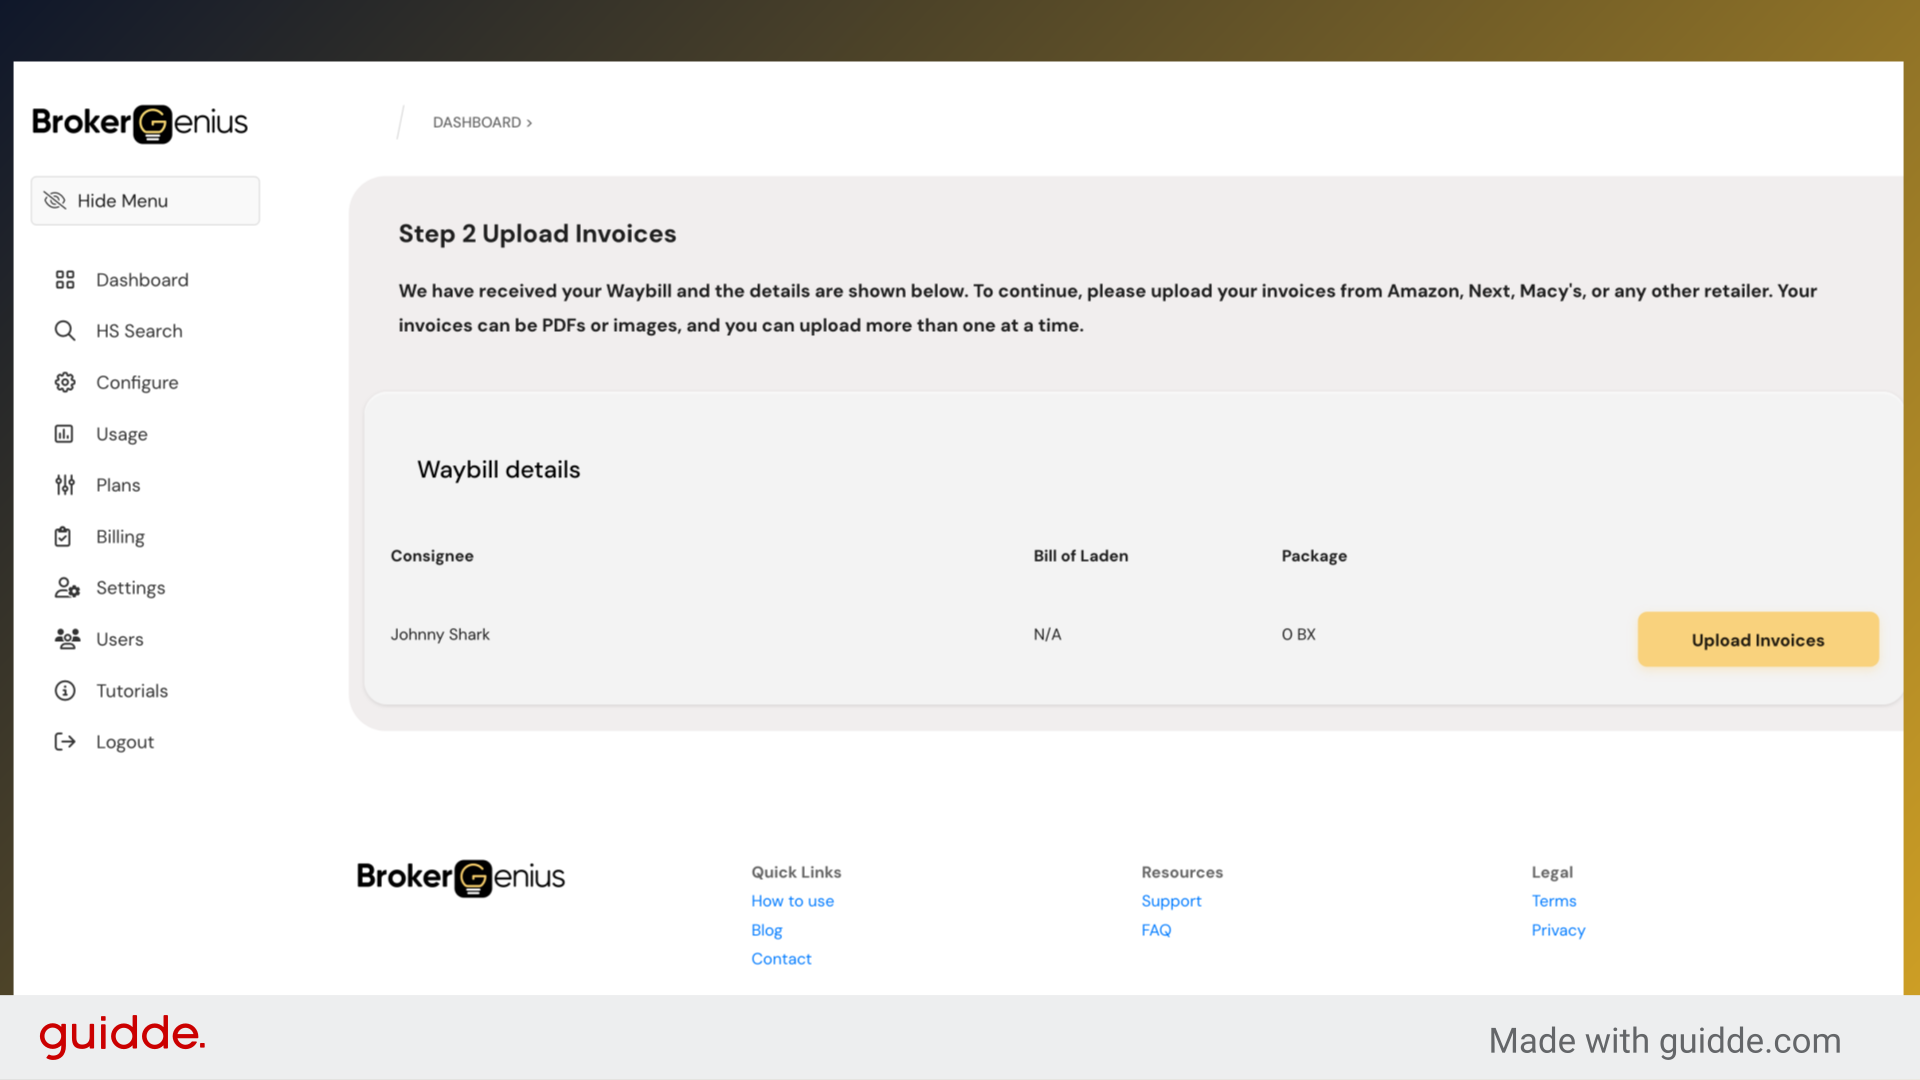
6. Ready to upload Invoice
You are now ready to upload your invoices, you may enter your waybill details at a later time